Google Slides is already open in most classrooms, which makes it a natural place to build a comic strip: every panel is a shape, every speech bubble is a callout, and the finished strip downloads as a PDF. This guide walks through the whole thing in six steps, gives you a free Google Slides comic strip template to start from, and is honest about where Slides gets clumsy and a dedicated comic tool is quicker.
Quick Summary
- Use File › Page setup to give the slide a page shape, such as 11 × 8.5 in for a landscape strip.
- Panels are rectangles from Insert › Shape; speech bubbles come from the Callouts group.
- Line panels up with Arrange › Distribute and keep bubbles on top with Arrange › Order.
- Download with File › Download › PDF document to print or hand in.
- Or start from our free template: 3-panel, 4-panel, 6-panel and 2 × 2 slides plus ready-made bubbles.
Free Google Slides comic strip template
The template is a normal presentation file that opens in Google Slides and PowerPoint. It has a how-to slide, four strip layouts (3 panels, 4 panels, 6 panels and a 2 × 2 square) with Title and Name fields, and a last slide of speech, thought, shout and whisper bubbles, a caption box and a BAM! burst to copy and paste.
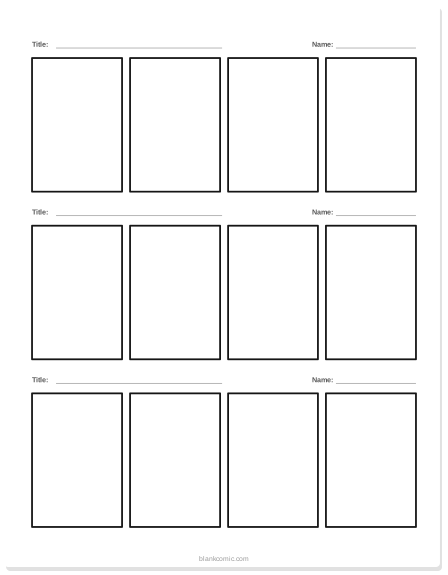
Comic strip template for Google Slides and PowerPoint
Six slides, 16:9, every panel and bubble editable. In Google Slides choose File › Open › Upload and pick the file; it converts to a Slides presentation in your Drive.
Tip: Teachers: put the converted file in a Google Classroom assignment with Make a copy for each student, so every student edits their own copy.
Step 1: Set up the page
A new presentation is a 16:9 slide, which is fine for a horizontal strip on screen. If the strip will be printed, give it the shape of a sheet of paper first, before you place anything, because changing the size later stretches what is already there.
Do this
- Open File › Page setup.
- Choose Custom from the drop-down.
- Enter the size and unit (inches, centimeters, points or pixels), then click Apply.
| What you are making | Custom size |
|---|---|
| Landscape strip to print on US Letter | 11 × 8.5 in |
| Landscape strip to print on A4 | 29.7 × 21 cm |
| Portrait comic page (Letter / A4) | 8.5 × 11 in / 21 × 29.7 cm |
| Square post for Instagram | 1080 × 1080 px |
| Vertical strip for phones | 1080 × 1920 px |
Step 2: Draw the panels
Choose Insert › Shape › Shapes, pick the rectangle and drag out the first panel. Set the border with the Border weight button in the toolbar (3 or 4 px reads well when printed) and the border color to black. Leave the fill white or transparent.
Now duplicate it: select the panel and press Ctrl + D (Cmd + D on a Mac) until you have as many panels as you need. Select them all, then use Arrange › Align › Top and Arrange › Distribute › Horizontally so the gaps between panels, the gutters, are identical. Even gutters are the single biggest thing that makes a Slides comic look deliberate rather than improvised.
Tip: Not sure how many panels? Three suits a quick joke, four suits a joke with a twist, six suits a short story. Our guide to how many panels a comic page needs goes deeper.
Step 3: Add the pictures
You have three ways to fill a panel, and you can mix them:
- Images. Insert › Image lets you upload a drawing, take a photo with the camera or search the web. Drag the picture over a panel and resize it. To trim it to the panel, use the crop tool, or the drop-down next to it to mask the image into a shape.
- Shapes. Circles, rectangles and lines make perfectly good stick-figure characters, and they stay editable.
- Scribble. Insert › Line › Scribble draws freehand with the mouse or a stylus. It is rough, but fine for a quick sketch or an arrow.
If an image covers the panel border, right-click it and choose Order › Send backward until the border shows again.
Check this: Web images you find through Insert › Image may be copyrighted. For school work that is usually fine; for anything you publish, draw it yourself or use images you have the right to use.
Step 4: Add speech bubbles
Open Insert › Shape › Callouts. The oval callout is a classic speech bubble, the cloud is a thought bubble, and the rounded rectangle works for captions. Drag one onto a panel, then:
- Drag the small yellow handle to aim the tail at the speaker’s mouth.
- Double-click inside the bubble and type. Set the font to something bold and readable, and center the text.
- Right-click and choose Order › Bring to front, so the bubble sits above the picture.
- Copy the finished bubble and paste it into the next panel, so every bubble shares one style.
Place the first speaker’s bubble at the top left of the panel and the reply lower and to the right, because readers follow the same path as text. The full rules are in how to lay out speech bubbles, and the bubble shapes themselves in speech bubble styles explained.
Step 5: Captions and sound effects
A caption is a plain rectangle with a light fill (pale yellow is the comic tradition) and a short line such as “Meanwhile…” in the corner of a panel. Sound effects are bigger and louder: type the word in a text box, choose a heavy font, make it large, and rotate it slightly using the round handle. Our template’s last slide has a ready BAM! burst you can copy.
For more on fonts, sizes and sound effects, see the comic lettering guide.
Step 6: Download, print or share
| You want to… | Do this |
|---|---|
| Print or hand in the strip | File › Download › PDF document |
| Post one slide as an image | File › Download › PNG image (downloads the current slide) |
| Let a teacher or partner comment | Share, then give them Commenter access |
| Work on it in PowerPoint | File › Download › Microsoft PowerPoint |
Doing the same thing in PowerPoint
Everything above works in PowerPoint with slightly different menu names, and the template opens there directly.
| Task | Google Slides | PowerPoint |
|---|---|---|
| Page size | File › Page setup › Custom | Design › Slide Size › Custom Slide Size |
| Panels | Insert › Shape › Shapes | Insert › Shapes › Rectangles |
| Speech bubbles | Insert › Shape › Callouts | Insert › Shapes › Callouts |
| Line up panels | Arrange › Distribute | Shape Format › Align › Distribute |
| Export | File › Download › PDF | File › Export › PDF |
Problems you will hit, and the fixes
| Problem | Fix |
|---|---|
| The bubble disappears behind a picture | Select the bubble, Arrange › Order › Bring to front |
| The tail points at the wrong character | Drag the yellow handle, not the corner handles |
| Text spills out of the bubble | Shorten the line first, then resize the bubble; shrinking the font is the last resort |
| Panels are slightly different sizes | Select all, set the same width and height under Format options › Size & Rotation |
| Everything moves when you click | Select a panel’s parts and use Arrange › Group |
| The printout has white margins in odd places | Set the page size before adding content, and print the PDF at 100% scale |
When a comic tool is faster
Slides is good at two things: everyone at school already has it, and several people can edit one file at the same time. It is less good at comics. Panels are loose shapes that drift, there is no panel splitting, and bubbles need fiddling to look consistent.
A dedicated comic maker removes that fiddling. In the BlankComic editor you pick a page size, click a panel and press a key to split it, drag the borders to resize, and choose from six bubble types: speech, thought, shout, whisper, narration and caption. It runs in the browser with no account and no Google sign-in, which matters on shared school computers, and it exports PNG, JPG, PDF or SVG. For a lesson built around it, see classroom comic templates; if you came here from Docs, our Google Docs comic strip guide covers that route too.
Try it: a four-panel strip in 15 minutes
Exercise
- Open the template, delete the how-to slide and keep the 4-panel slide.
- Write one line per panel: setup, development, twist, punchline. Our easy comic strip ideas has 50 starters.
- Draw or insert a picture in each panel, then copy one bubble from the last slide into panels 1, 2 and 4.
- Leave panel 3 silent. A wordless beat right before the punchline makes it land.
- Download a PDF and read it out loud to someone. If they do not smile at panel 4, rewrite panel 3.
Frequently Asked Questions
Does Google Slides have a comic strip template?
Google Slides has no built-in comic strip template, but you can open any .pptx template in Slides. Our free template has 3-panel, 4-panel, 6-panel and 2 × 2 layouts plus ready-made speech bubbles; upload it with File › Open › Upload.
How do I add speech bubbles in Google Slides?
Go to Insert › Shape › Callouts and pick the oval or cloud callout. Drag the yellow handle to aim the tail, double-click to type, and use Arrange › Order › Bring to front so the bubble sits above the picture.
What page size should a Google Slides comic be?
Use File › Page setup › Custom. 11 × 8.5 in prints a landscape strip on US Letter, 29.7 × 21 cm on A4, and 1080 × 1080 px makes a square social media post.
Can students make a comic in Google Slides without extra apps?
Yes. Panels are rectangles, bubbles are callouts and art can be images, shapes or freehand Scribble lines. Everything is built into Slides.
How do I print a comic strip from Google Slides?
Choose File › Download › PDF document and print the PDF at 100% scale. Set the page size before you build the strip so nothing gets stretched.
Is there a comic maker that does not need a Google login?
Yes. The BlankComic editor runs in the browser with no account or sign-in, has panel splitting and speech bubbles built in, and exports PNG, JPG, PDF or SVG.
Sources and further reading
Facts in this guide were checked against the following resources. All are free to read.
- Google Docs Editors Help, “Change slide size & measurement units in Google Slides”: File › Page setup and custom sizes in inches, centimeters, points or pixels.
- Google Docs Editors Help, “Insert and arrange text, shapes, diagrams, and lines”: Insert › Shape and Arrange › Group.